Create an Android Project
How to create a new Android project with Android Studio and describes some of the files and Folder Structure in the project.
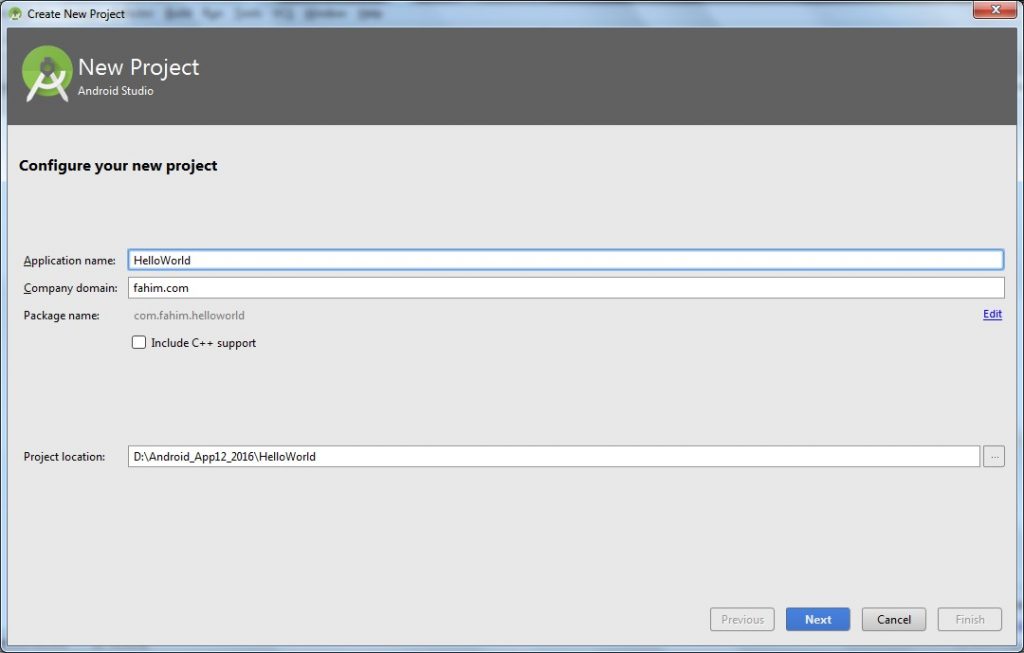
In Android Studio, create a new project:
In the
New Project screen, enter the following values:
- Application Name: "HelloWorld"
- Company Domain: "fahim.com"
You might want to change the project location, but leave the other options as they are. Click
NEXT
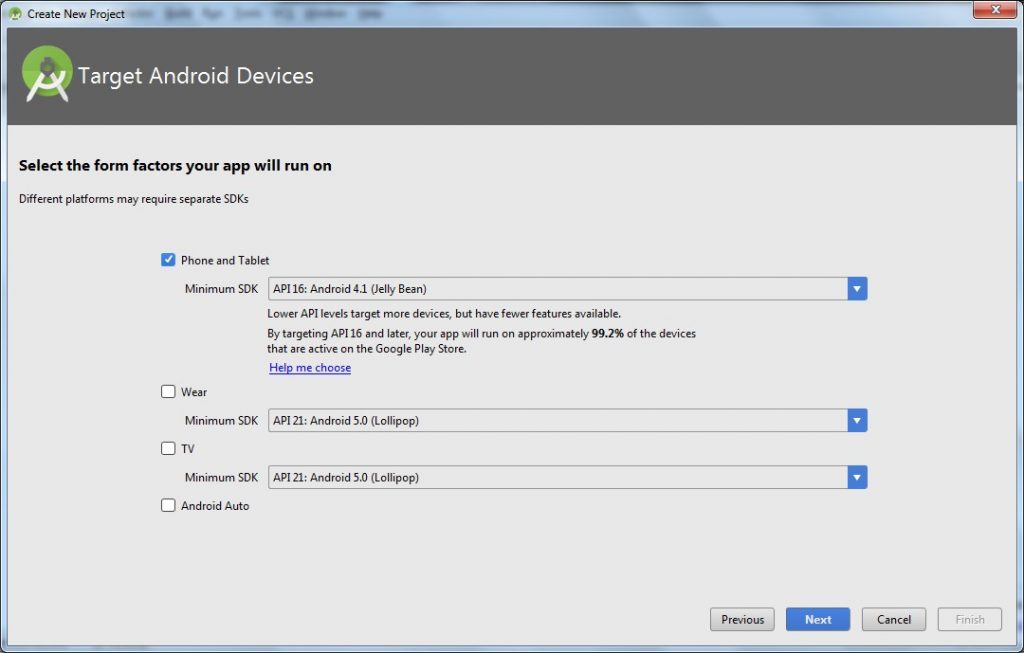
 Target Devises
 screen, keep the default values and click
Next
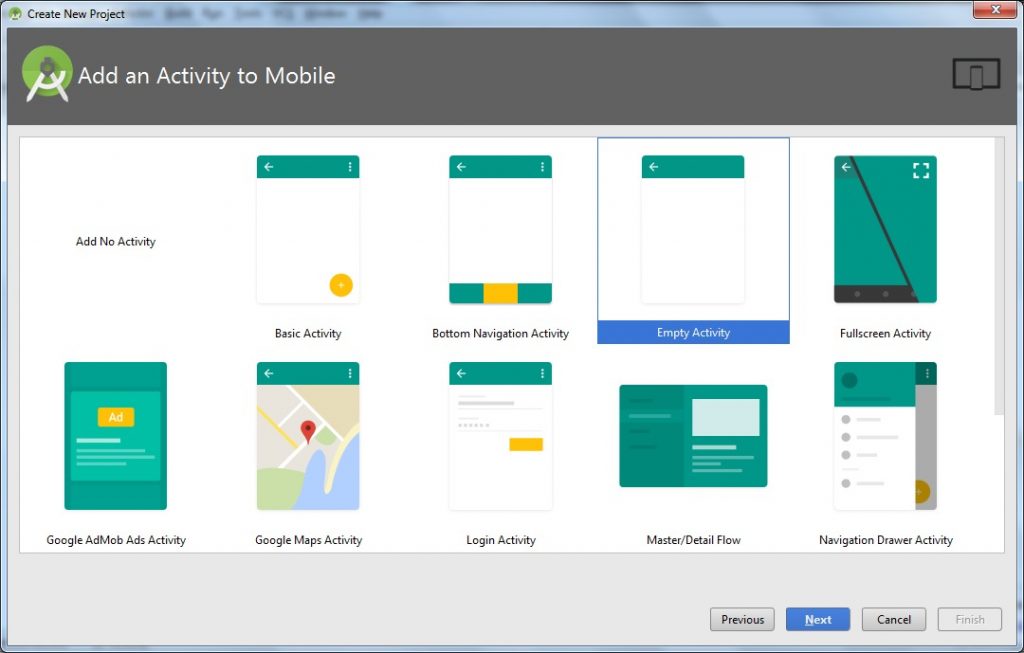
- In the Add, an Activity to Mobile screen, select Blank Activity and click Next.
- In the Customize the Activity screen, keep the default values and click Finish.
 You can see the following files:
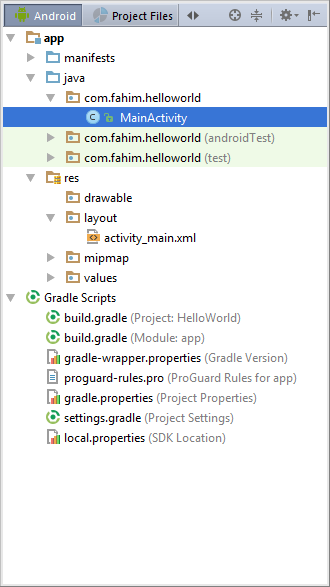
- app -> java -> com.fahim.helloworld-> MainActivity.java
- This is the main activity (the entry point for your app). When you build and run the App, the system begins an instance of this
Activity and loads its layout.
- app -> res -> layout -> activity_main.xml
- This XML file defines the layout for the activity's UI. It contains a
TextView component with the text "Hello world!".
- app -> manifests-> AndroidManifest.xml
- Manifest file describes the significant features of the App & assigns each of its components.
- Gradle Scripts -> build.gradle
- You may see 2 files with this name: one for the project level and one for the "app" module Application level. Each module has its own
build.gradle file, but this project currently has just one module. You'll mostly work with the module's build.gradle file to configure how the Gradle tools compile and organize & build your app.
Run Your App
You can now run the app on a real device or an emulator
Run App on a real device
Set up your device as follows:
- Connect your device to your development machine with a USB cable. If you're developing on Windows, you might need to install the appropriate USB driver for your device if your driver is not already up to date.
You need to connect your Device with PC for installing driver. On the PC go to Device Manager (For Windows 7 you can open Device Manager by right click on Computer and click Properties you will see the Device Manager link on the side menu.For Windows 8.1 you can open Device Manager by right click on start button. )
On Device Manager window discover the Other devices you will see something with a warning sign. In the picture, the unknown device labeled as "Android Phone" (Sometimes it show as the name of device) right click on it and select "Update Driver Software"
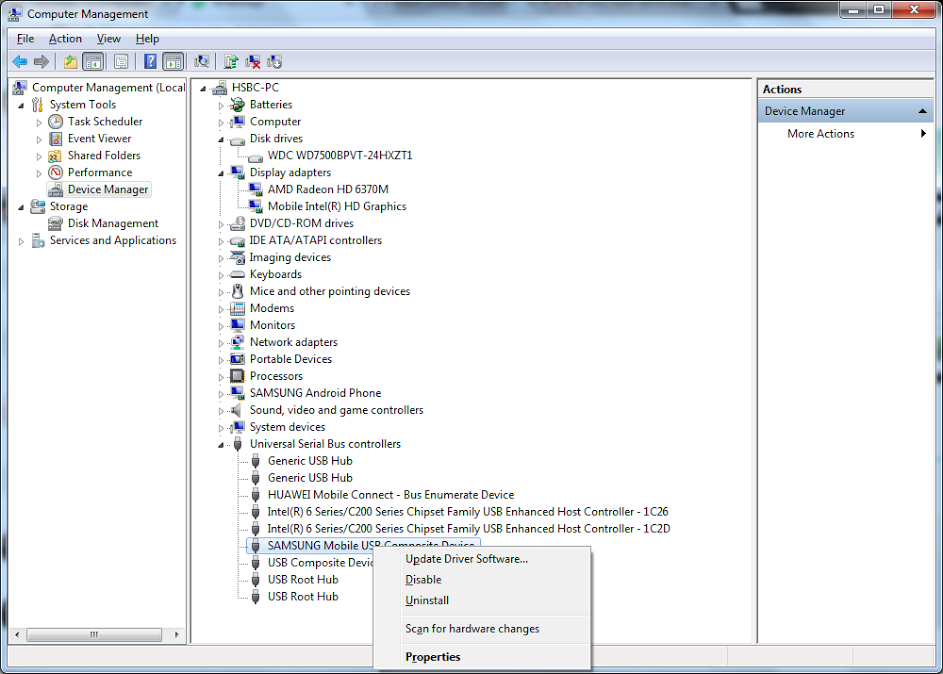
Then click the "Browse my computer for driver software" option.
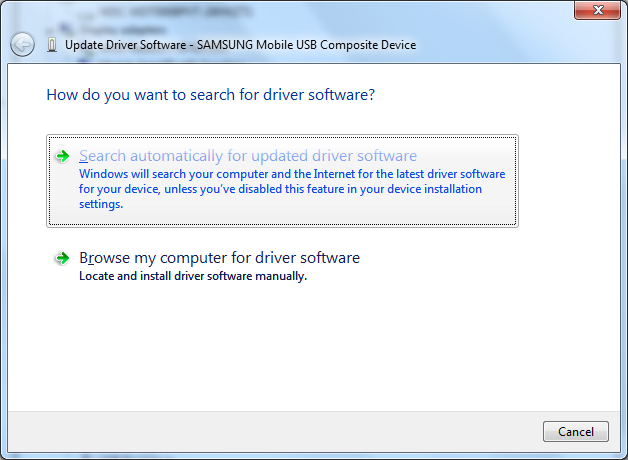
Browse to the <Android SDK PATH>\extras\google\usb_driver then click "Next" button.
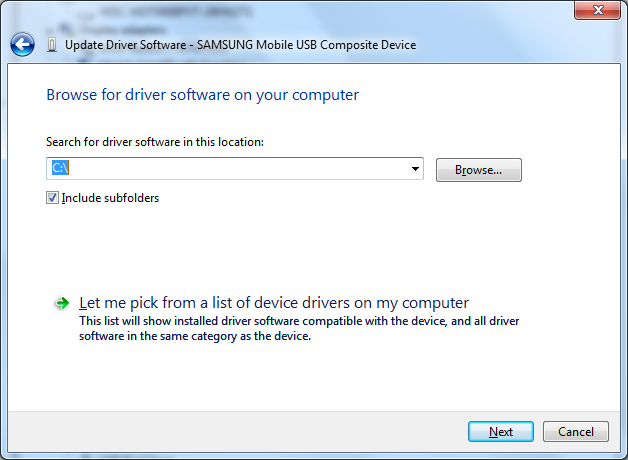
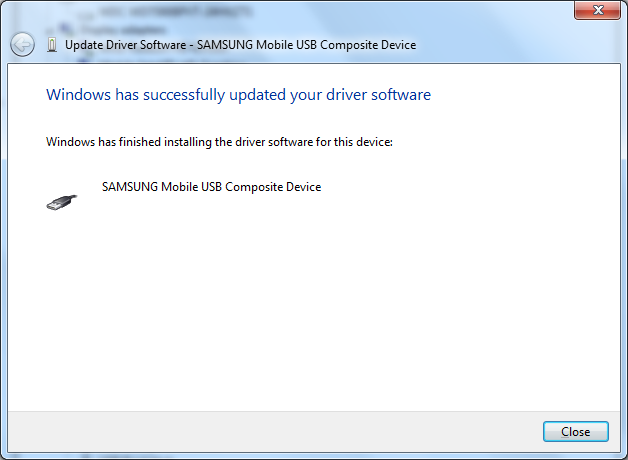
When driver installed it will display as the picture below.
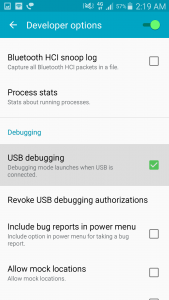
2.Enable
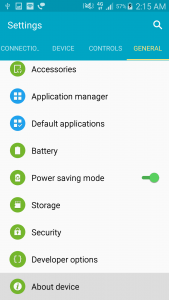
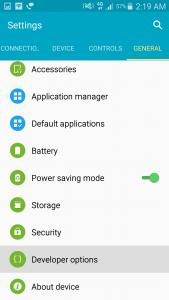
USB debugging on your device by going to
Settings > Developer options.
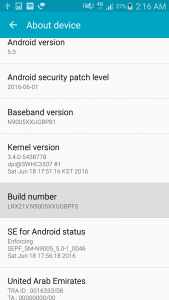
Note: On Android 4.2 and newer, Developer options is hidden by default. To make it available, go to Settings > About phone and tap Build number 7 times. Return to the previous screen to find Developer options.
Run the app from Android Studio as follows:
- In Android Studio, click the app module in the Project window and then select Run > Run (or click Run in the toolbar) or you can directly press SHIFT + F10.
- In the Select Deployment Target window, select your device, and click OK.
Android Studio installs the app on your connected device and starts it.
Run App on an emulator
For First time, you need to create an AVD (Android Virtual Device) definition. It creates the characteristics of an Android phone, tablet, Android Wear, or Android TV device that you want to simulate in the Android Emulator.
Create an AVD (Android Virtual Device) Definition as follows:
- Launch the Android Virtual Device Manager by going to Tools -> Android -> AVD Manager, or by clicking the AVD Manager icon present in the toolbar.
- Now appears a Virtual Devices screen, click Create Virtual Device.
- In that Select Hardware screen, select an Android device, such as Nexus, and then click Next.
- In the System Image screen, click Download for one of the recommended system images. Agree to the terms to complete the download.
- After the downloading is complete, pick one of the system images from the list and click Next.
- On the next screen, leave all the configuration settings as they are and click Finish.
- Back in the Virtual Devices screen, select the Android device you just created and click Launch this AVD in the emulator.
While the emulator starts up, close the Android Virtual Device Manager window and return to your project so you can run the app:
- Once the emulator is booted up, click the app module in the Project window and then select Run > Run (or click Run in the toolbar) or you can press SHIFT + F10.
- In the Select Deployment Target window, select the emulator and click OK.
Android Studio installs the app on the emulator and Run it for you.